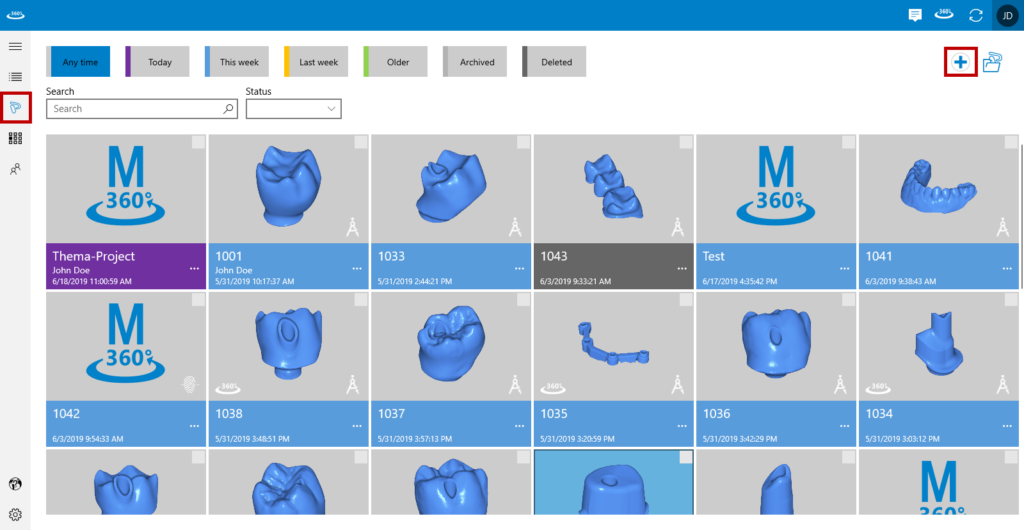
When you choose “Projects” from the left side bar you can see all your current projects. They can be filtered by the last modification, by the project status (Scanned, Designed, Ordered, …) or by a textual search.

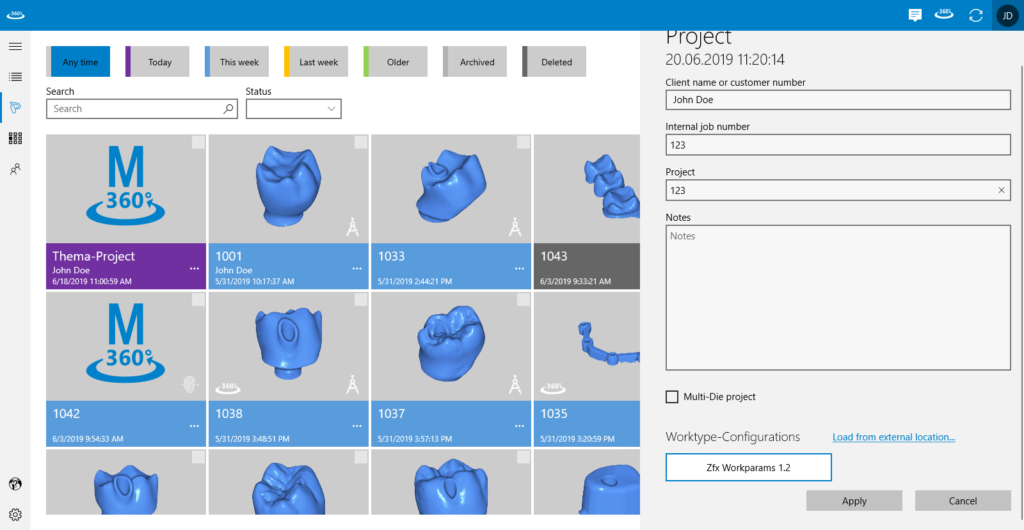
When you press the “+” on the top right corner you can create a new project.
You have to provide a project name (mandatory) to your project.
Optionally you can link it to a private contact, you can add a Jobnumber, which might be an internal number you use or any other text you want.
Every additional information has to go into the note section of the project.
If you have more than one worktype configuration (Definition of worktypes, materials and parameters) it has to be selected as well.
For more information about Multi-Die Projects please see the specific chapter about it.

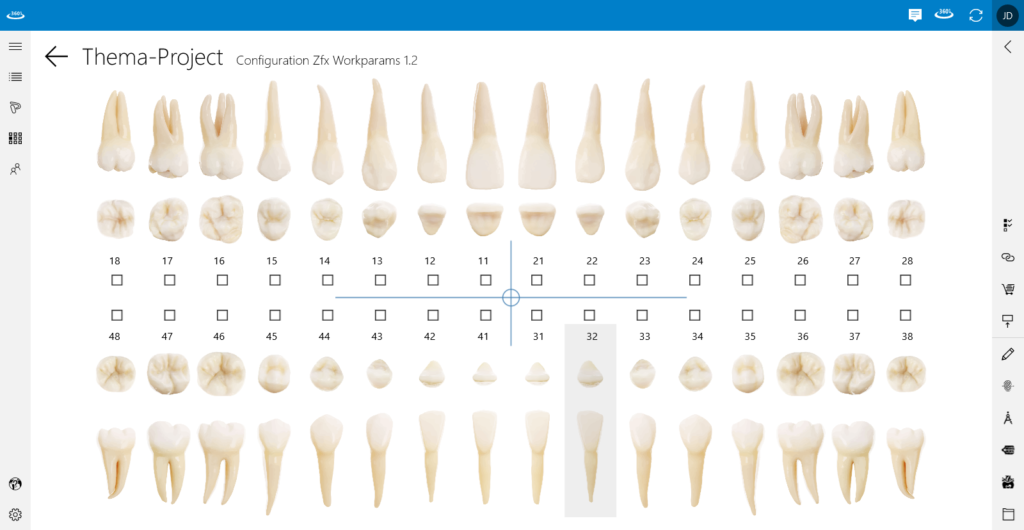
You now successfully created a new project. The work on each tooth is displayed graphically in this teeth overview.

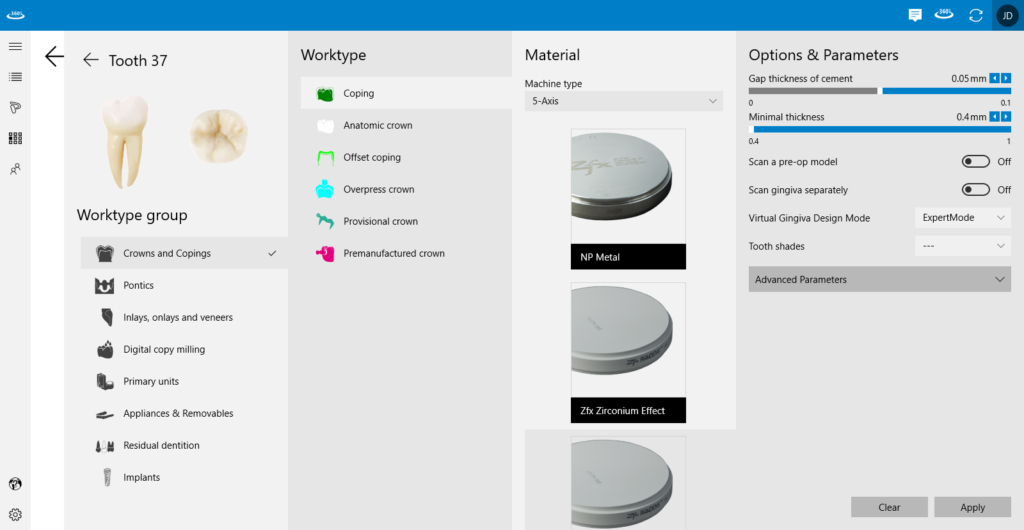
After you click on a tooth a new menu will open where you can edit the tooth.
You can edit the worktype group, the worktype itself, if you choose crowns or coping you can choose the material type and much more.